More insights.

Subscribe to our newsletter.
Deep dives into design thinking, creative process, and the intersection of business and aesthetics.
Cosplay photography is more than capturing costumes—it's about storytelling. And one of the most powerful tools for telling those stories is lighting.
Whether you're shooting indoors, outdoors, in a studio, or at a convention, lighting can dramatically impact how a character is portrayed. Here’s a guide packed with lighting tricks and techniques to help you breathe life into cosplay portraits.
1. Understand the Mood of the Character
Before setting up lights, ask:
Is the character dark and mysterious?
Are they bright and heroic?
Does their world have neon tech, fantasy glow, or natural magic?
Match lighting to the mood:
Character Type | Lighting Style |
|---|---|
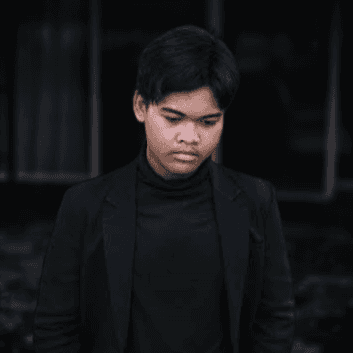
VIllain / Anti-Hero | Low-key lighting, side shadows |
Hero / Protagonist | Bright, high-key lighting |
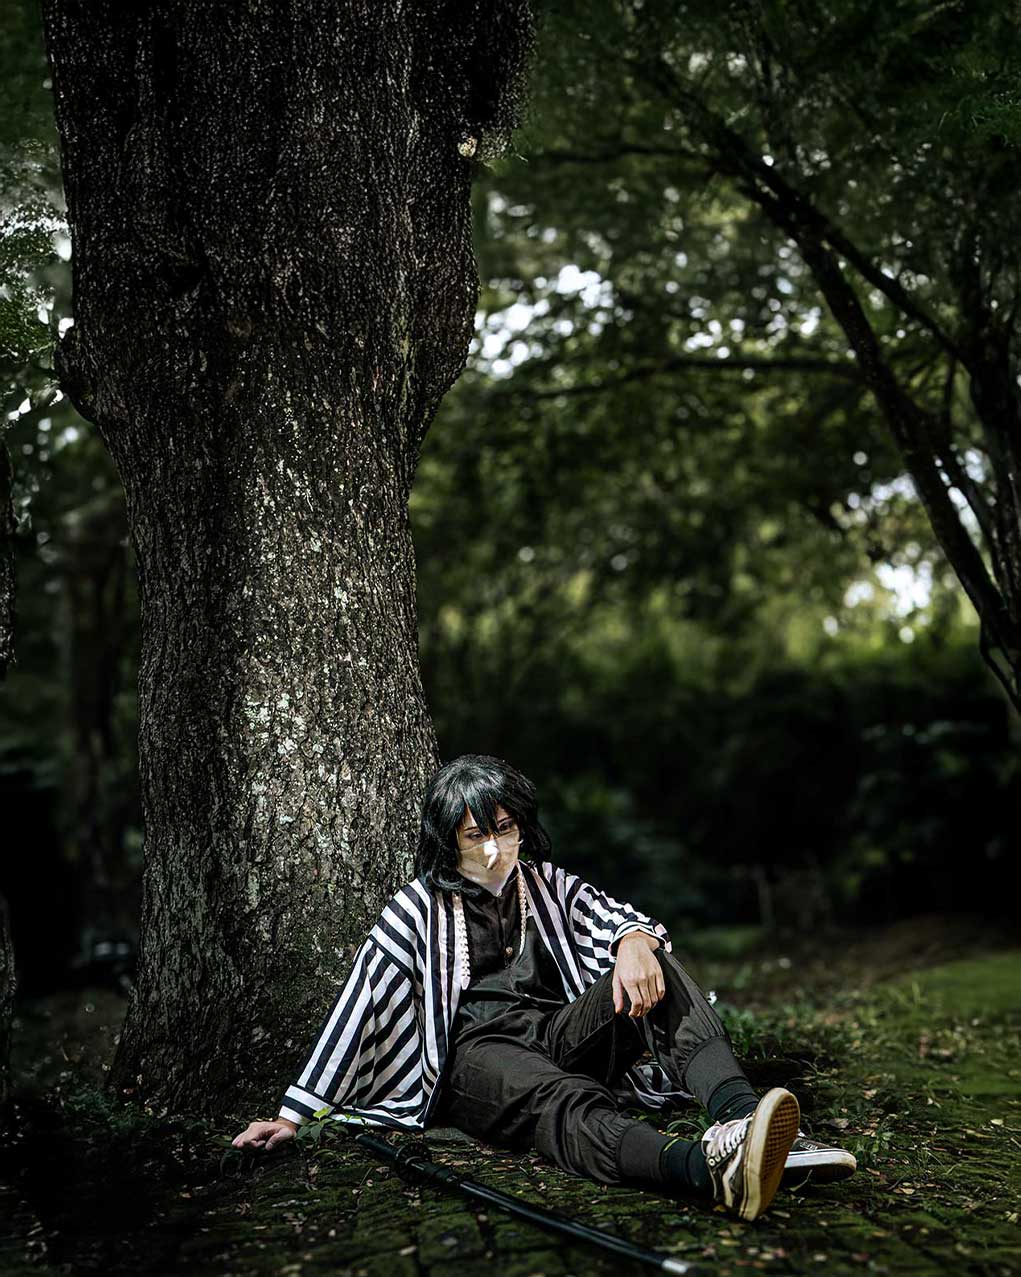
Fantasy / Magical | Backlighting, soft glows, rim light |
Sci-Fi / Cyberpunk | Colored gels, harsh side lighting |
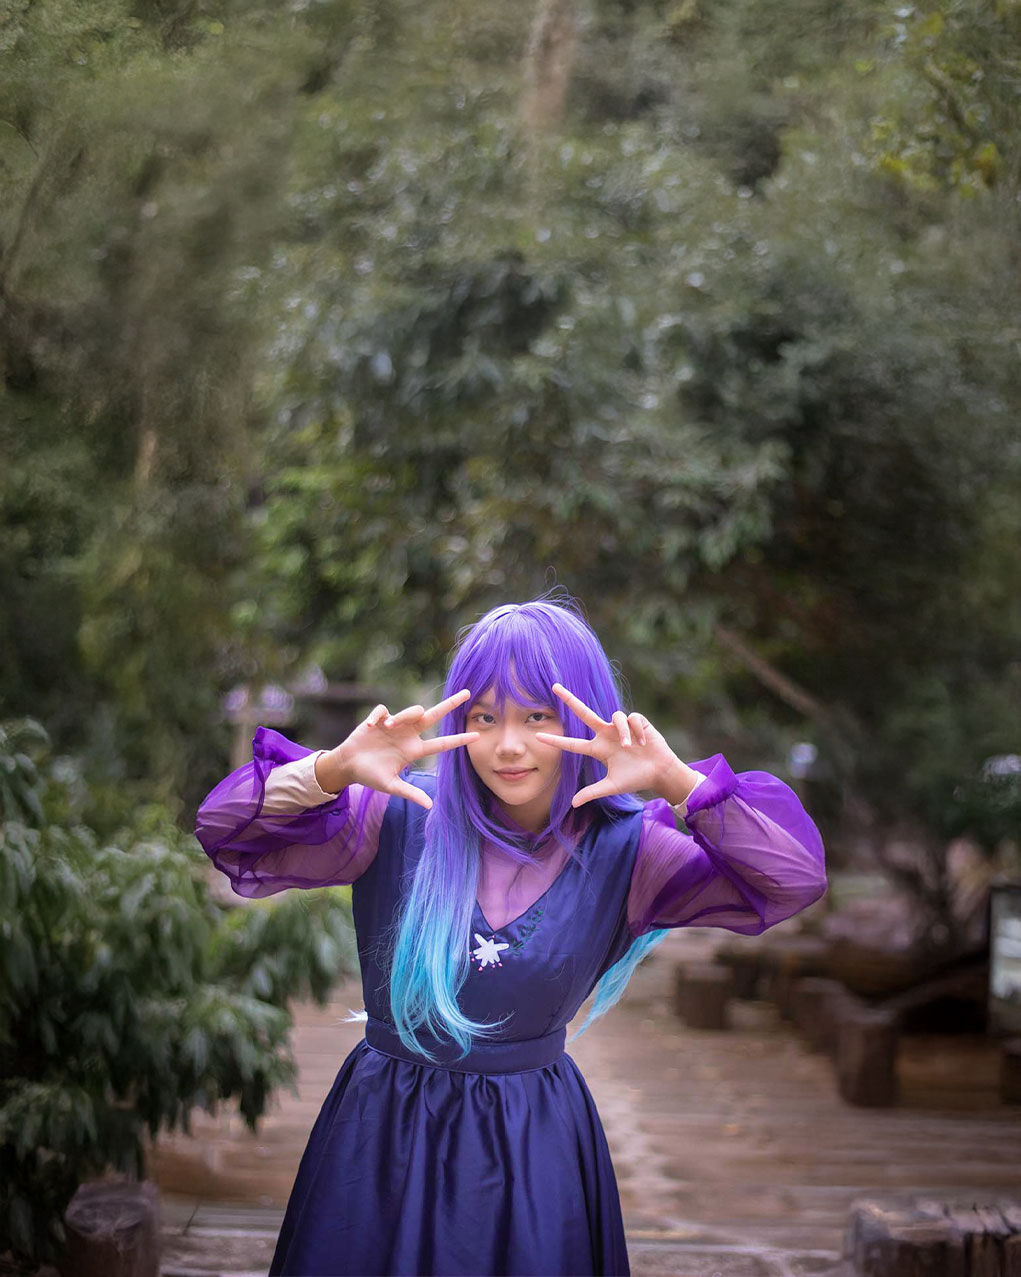
Anime / Cartoon-like | Even, soft frontal lighting |
2. Use Natural Light Creatively
Ideal for: Outdoor shoots, beginner-friendly setups
Golden Hour Magic:
Shoot during early morning or just before sunset for warm, soft light.
Great for fantasy or romantic characters.
Overcast Days:
Diffuses sunlight naturally—perfect for even skin tones and detailed costumes.
Window Light:
Use indoor window lighting for natural portrait vibes with directional shadows.
Add a reflector opposite the window for fill light.
Tips:
Avoid harsh midday sun—it creates unflattering shadows.
Use trees or walls for natural diffusion.
3. Use Off-Camera Flash for Control
Off-camera flash allows precise control of light direction and intensity.
Try:
45° Rembrandt Lighting – Creates depth with dramatic cheekbone shadows.
Side Lighting – Emphasizes texture in armor or fabric.
Backlighting – Adds glow or separation from the background.
Modifiers to Use:
Softboxes for soft, flattering light
Grids for focused, dramatic effects
Color gels to match the character’s aesthetic
📸 Pro Tip: Use a low flash power and wide aperture for shallow depth of field and natural background blur.
4. Add Color Gels for Mood and Effect
Color gels can change everything—they instantly transform a basic light into a storytelling device.
Examples:
Red/Blue for superhero vs. villain drama
Green for toxic or eerie sci-fi vibes
Purple/Magenta for fantasy magic or anime aesthetics
How to Use:
Place gels on LED panels or speedlights.
Mix with neutral light to create depth.
Use complementary colors (e.g., orange + teal) for visual punch.
🎨 Creative Twist: Mimic in-game lighting by referencing screenshots or anime scenes.
5. Rim Lighting for Definition and Drama
Rim lighting (aka back or hair lighting) outlines your subject and separates them from the background.
Ideal for:
Characters with capes, flowing hair, or detailed silhouettes
Cinematic or ethereal looks
Setup:
Place a light behind the subject aimed at their shoulders/back of head.
Use a snoot or grid to control the spill.
Combine with a key light in front for a 3D effect.
6. Use LED Props as Light Sources
LEDs aren’t just cool—they can be functional.
Common LED uses:
Light-up swords, armor, visors, or staffs
Custom RGB strips hidden in costumes
In-world lighting that matches the game or anime
Why it works:
Adds realistic glow and immersive storytelling
Reduces need for post-production effects
Tips:
Lower ambient light so the LEDs stand out
Balance exposure so costume lights don’t blow out
💡 Pro Move: Use these LEDs as practical lighting, and shape your setup around them.
7. Experiment with Shadows and Silhouettes
Shadows can say more than light. Use them to:
Add mystery or tension
Emphasize form and shape
Reveal only parts of the costume for stylized looks
Techniques:
Block light with objects (blinds, weapons, props)
Shoot into the light for silhouettes
Let shadows fall across the face for moody portraits
📸 Inspiration: Think film noir, horror, or psychological thriller scenes.
8. Mimic Cinematic Lighting Styles
Take cues from movies, shows, or games the cosplay is based on.
Examples:
Rembrandt for medieval knights or dramatic anime
Split Lighting for dual personalities or villains
Clamshell Lighting for beauty shots of magical girls or idols
Color contrast lighting (e.g., Blade Runner, Cyberpunk 2077)
📽️ Pro Tip: Use screenshots as a reference and break down the lighting direction.
9. Essential Lighting Gear for Cosplay Shoots
GearPurposeSpeedlightsPortable flash for dramatic setupsLED PanelsContinuous light with RGB optionsSoftbox / UmbrellaSoft, even light for portraitsColor GelsCreative lighting effectsReflectorFill shadows and bounce natural lightLight StandsPositioning lights at desired angles
🛒 Budget Note: You don’t need a full studio. Even 1 speedlight + 1 reflector can deliver amazing results.
10. Light the Character, Not Just the Cosplay
Above all, think about the emotion, personality, and story of the character.
Ask yourself:
What makes this character unique?
How can I use light to bring their world to life?
What do I want the viewer to feel?
When you light with intent, the cosplay becomes more than a costume—it becomes a living scene.
Conclusion
Lighting is the difference between a cosplay photo and a cosplay portrait. Whether you use sunlight, flashes, LEDs, or a mix of all three, the key is to match your lighting to the character’s tone.
Experiment, study your references, and collaborate with your cosplayer to create magic through light.
Cosplay photography is more than capturing costumes—it's about storytelling. And one of the most powerful tools for telling those stories is lighting.
Whether you're shooting indoors, outdoors, in a studio, or at a convention, lighting can dramatically impact how a character is portrayed. Here’s a guide packed with lighting tricks and techniques to help you breathe life into cosplay portraits.
1. Understand the Mood of the Character
Before setting up lights, ask:
Is the character dark and mysterious?
Are they bright and heroic?
Does their world have neon tech, fantasy glow, or natural magic?
Match lighting to the mood:
Character Type | Lighting Style |
|---|---|
VIllain / Anti-Hero | Low-key lighting, side shadows |
Hero / Protagonist | Bright, high-key lighting |
Fantasy / Magical | Backlighting, soft glows, rim light |
Sci-Fi / Cyberpunk | Colored gels, harsh side lighting |
Anime / Cartoon-like | Even, soft frontal lighting |
2. Use Natural Light Creatively
Ideal for: Outdoor shoots, beginner-friendly setups
Golden Hour Magic:
Shoot during early morning or just before sunset for warm, soft light.
Great for fantasy or romantic characters.
Overcast Days:
Diffuses sunlight naturally—perfect for even skin tones and detailed costumes.
Window Light:
Use indoor window lighting for natural portrait vibes with directional shadows.
Add a reflector opposite the window for fill light.
Tips:
Avoid harsh midday sun—it creates unflattering shadows.
Use trees or walls for natural diffusion.
3. Use Off-Camera Flash for Control
Off-camera flash allows precise control of light direction and intensity.
Try:
45° Rembrandt Lighting – Creates depth with dramatic cheekbone shadows.
Side Lighting – Emphasizes texture in armor or fabric.
Backlighting – Adds glow or separation from the background.
Modifiers to Use:
Softboxes for soft, flattering light
Grids for focused, dramatic effects
Color gels to match the character’s aesthetic
📸 Pro Tip: Use a low flash power and wide aperture for shallow depth of field and natural background blur.
4. Add Color Gels for Mood and Effect
Color gels can change everything—they instantly transform a basic light into a storytelling device.
Examples:
Red/Blue for superhero vs. villain drama
Green for toxic or eerie sci-fi vibes
Purple/Magenta for fantasy magic or anime aesthetics
How to Use:
Place gels on LED panels or speedlights.
Mix with neutral light to create depth.
Use complementary colors (e.g., orange + teal) for visual punch.
🎨 Creative Twist: Mimic in-game lighting by referencing screenshots or anime scenes.
5. Rim Lighting for Definition and Drama
Rim lighting (aka back or hair lighting) outlines your subject and separates them from the background.
Ideal for:
Characters with capes, flowing hair, or detailed silhouettes
Cinematic or ethereal looks
Setup:
Place a light behind the subject aimed at their shoulders/back of head.
Use a snoot or grid to control the spill.
Combine with a key light in front for a 3D effect.
6. Use LED Props as Light Sources
LEDs aren’t just cool—they can be functional.
Common LED uses:
Light-up swords, armor, visors, or staffs
Custom RGB strips hidden in costumes
In-world lighting that matches the game or anime
Why it works:
Adds realistic glow and immersive storytelling
Reduces need for post-production effects
Tips:
Lower ambient light so the LEDs stand out
Balance exposure so costume lights don’t blow out
💡 Pro Move: Use these LEDs as practical lighting, and shape your setup around them.
7. Experiment with Shadows and Silhouettes
Shadows can say more than light. Use them to:
Add mystery or tension
Emphasize form and shape
Reveal only parts of the costume for stylized looks
Techniques:
Block light with objects (blinds, weapons, props)
Shoot into the light for silhouettes
Let shadows fall across the face for moody portraits
📸 Inspiration: Think film noir, horror, or psychological thriller scenes.
8. Mimic Cinematic Lighting Styles
Take cues from movies, shows, or games the cosplay is based on.
Examples:
Rembrandt for medieval knights or dramatic anime
Split Lighting for dual personalities or villains
Clamshell Lighting for beauty shots of magical girls or idols
Color contrast lighting (e.g., Blade Runner, Cyberpunk 2077)
📽️ Pro Tip: Use screenshots as a reference and break down the lighting direction.
9. Essential Lighting Gear for Cosplay Shoots
GearPurposeSpeedlightsPortable flash for dramatic setupsLED PanelsContinuous light with RGB optionsSoftbox / UmbrellaSoft, even light for portraitsColor GelsCreative lighting effectsReflectorFill shadows and bounce natural lightLight StandsPositioning lights at desired angles
🛒 Budget Note: You don’t need a full studio. Even 1 speedlight + 1 reflector can deliver amazing results.
10. Light the Character, Not Just the Cosplay
Above all, think about the emotion, personality, and story of the character.
Ask yourself:
What makes this character unique?
How can I use light to bring their world to life?
What do I want the viewer to feel?
When you light with intent, the cosplay becomes more than a costume—it becomes a living scene.
Conclusion
Lighting is the difference between a cosplay photo and a cosplay portrait. Whether you use sunlight, flashes, LEDs, or a mix of all three, the key is to match your lighting to the character’s tone.
Experiment, study your references, and collaborate with your cosplayer to create magic through light.